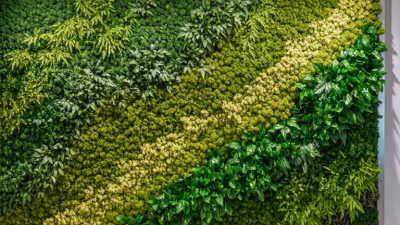
Choosing Artificial Green Walls in 2026 is less about picking the brightest display and more about matching it to the room. Patrick Blanc, botanist and vertical-garden designer, has described a core principle of plant growth: “Plants can grow without soil, as long as they have water, light, and nutrients.” Artificial walls do not need irrigation, of course, but his focus on conditions is still useful. For a faux installation, those conditions include viewing distance, available light, cleaning access, and the surface behind the panels.
Start with the space. A wall beside a sunny window may reveal fading sooner than a shaded hallway. A lobby needs convincing texture from several metres away; a small office may benefit from finer leaves and less visual density. Ask for a sample, then inspect it under the actual lighting. Look closely at leaf edges, color variation, backing, and joins. Small details matter.
There is no perfect panel.
Compare materials, fire-safety documentation, warranty terms, and cleaning instructions before ordering. Confirm how panels attach, whether edges can be trimmed, and how replacements are handled. For commercial projects, request product specifications rather than relying on product photos alone. Photos can flatter. They can also hide seams.
Budget for installation, not just the greenery. Measure the wall, note doors and outlets, and check whether the surface can support the system. A low-cost option may work well in a quiet corner, while a reception wall may justify denser foliage and stronger construction. Still, appearance is subjective, and samples can look different at full scale. Choose a supplier willing to explain limitations, not only benefits.
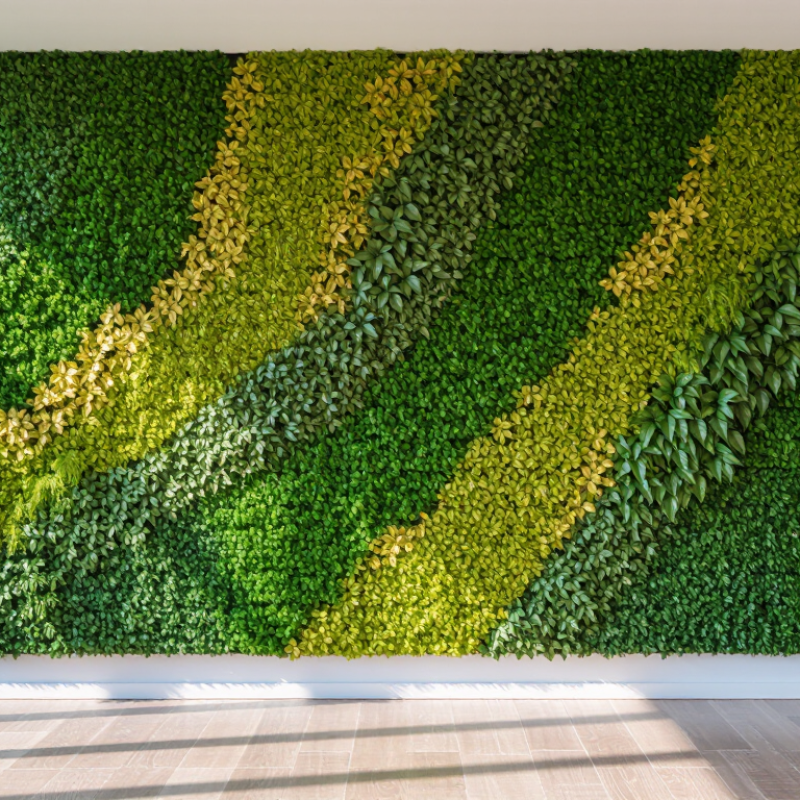
Before choosing an artificial green wall, decide what it needs to do. A lobby feature wall may create a welcoming first impression, while a patio screen may provide privacy and soften a hard surface. Measure the installation area, note the usual viewing distance, and consider whether people will pass close enough to touch the foliage. Small leaves can look detailed up close; larger leaves may read more clearly across a wide room. Be specific.
Next, record the site conditions and practical limits. Check whether the wall receives direct sunlight, heat, moisture, or frequent cleaning. For outdoor use, look for materials rated for UV exposure and the local weather, and confirm how panels attach to the existing surface. Indoor installations may need careful attention to ventilation, dust, and nearby heat sources. Ask for material and maintenance information, not just photographs. A sample can still mislead: lighting and viewing distance change how color and texture appear. Recheck it in the actual space.
Tips: Photograph the wall in morning and evening light. Compare samples beside the floor and furniture. Set a realistic maintenance plan, even for artificial foliage; dust gathers in leaf folds. If the wall is large or overhead, have a qualified installer assess the support and fixing points. A little extra planning helps prevent an attractive panel from becoming a difficult fixture.
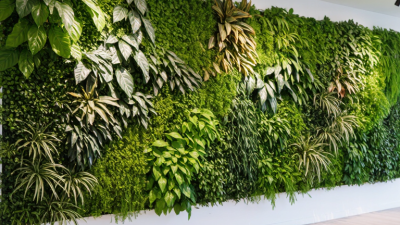
Foliage style shapes the wall’s mood before color does. Fern panels feel soft and layered, while boxwood creates a tighter, more formal surface. Ivy and trailing leaves add movement, especially beside a plain wall or window. Mixed foliage can look natural, but only when leaf sizes and shades vary with restraint. Too much contrast may resemble a crowded craft display. Look closely.
Material affects both durability and appearance. Polyethylene leaves often hold defined shapes, while fabric foliage can offer softer color transitions. For outdoor use, check whether the product is rated for UV exposure and inspect its backing and attachment points. Labels help, but they do not show how leaves fade after months in direct sun. Ask for a sample if possible, then view it in the intended light.
Visual realism depends on small details: visible stems, uneven leaf angles, and shadows between layers. A flat panel may look convincing from across a room, then feel repetitive up close. Check the edges and joins, where gaps can reveal the grid beneath. I would compare samples from several viewing distances, though that test is easy to skip when choosing quickly. No artificial wall stays dust-free; textured leaves simply make cleaning less obvious, not unnecessary.
Before choosing an artificial green wall, measure the full installation area, not just its visible center. Note ceiling height, corners, door swings, and nearby switches. Measure twice. A panel that looks compact online can feel oversized beside a narrow entry or low ceiling. For outdoor use, check exposure to wind, rain, and direct sun. Product specifications should state suitable conditions and care requirements.
Match panel dimensions to the wall’s shape. Modular panels can simplify coverage around columns or irregular edges, while larger sections reduce visible seams on broad, flat surfaces. Check how panels connect and whether edges can be trimmed without exposing the backing. Leave access to outlets, inspection points, and removable fixtures. A tight fit may look neat at first, but make later maintenance awkward.
Mounting depends on the wall material. Drywall may need studs or rated anchors; masonry often requires compatible fasteners and a suitable drill bit. Confirm the combined panel and support weight before installation. In rental spaces, a freestanding frame may avoid wall damage, though it needs a stable footprint. Not always. Corner gaps are easy to miss when planning from a small sample. Make a mock-up with tape or spare pieces, then check it from the room’s usual viewing distance. A mock-up can still miss how shadows fall.
| How to Choose Artificial Green Walls in 2026 - Match Wall Size and Mounting Options to the Installation Site | ||||
|---|---|---|---|---|
| Installation Site | Wall Size and Coverage | Suitable Mounting Options | Site Checks | Planning Tip |
| Small indoor accent wall | Measure the finished width and height. For a compact feature, plan around the actual wall area rather than buying by room size. | Attach panels to a backing board, or fasten directly to suitable wall framing with compatible screws. | Check for electrical outlets, switches, trim, and access panels. Identify stud locations before drilling. | Dry-fit the layout first and plan where panel edges and cut lines will fall. |
| Large indoor feature wall | Calculate area as width × height. Divide the total area by the coverage per panel, then allow for cuts and pattern matching. | Use a levelled support grid or backing board for a more even surface; secure the support to structural framing where applicable. | Check wall flatness, substrate condition, and the location of utilities. Confirm that the wall and fixings can support the selected system. | For wide installations, establish a straight reference line and check alignment after each section. |
| Drywall or plasterboard | Measure the usable wall area, excluding openings and areas that must remain clear. | Fasten into studs or use a suitable backing board secured to framing. Do not assume the wall surface alone can carry the installation. | Locate studs and hidden services. Select fasteners for the wall construction and the load specified by the panel supplier. | Use a level to mark fixing points, and follow the fastener and spacing guidance for the chosen system. |
| Brick, concrete, or masonry | Measure the surface and note uneven areas that could affect panel alignment or coverage. | Use masonry-compatible anchors and screws, or install a suitable subframe fixed to the masonry. | Check for loose mortar, cracks, and concealed pipes or wiring. Choose drilling equipment and anchors appropriate to the substrate. | Test the proposed fixing method on a discreet area when the surface condition is uncertain. |
| Outdoor wall or sheltered exterior | Measure the exposed area and account for corners, edges, and any wall features that interrupt the layout. | Use corrosion-resistant fixings and a mounting system approved for the intended outdoor exposure. | Confirm the product is rated for outdoor use and UV exposure. Consider wind, rain, temperature changes, and local fire requirements. | Follow the supplier’s outdoor installation guidance; sheltered and fully exposed sites may require different products and fixings. |
| Temporary display or rental space | Size the display to the available area and check that it can be moved through doors and corridors. | Consider a freestanding frame or removable backing panel instead of fixing directly to the building wall. | Check venue rules, stability, access routes, and whether temporary fixings are permitted. | Keep the support stable and ensure the completed display does not obstruct exits or required access. |
| High-traffic public or commercial area | Measure the full installation zone, including the height reachable by visitors and the clearance around the display. | Use secure mechanical fixings into an appropriate substrate; select a system suitable for the site’s use and maintenance needs. | Check local building and fire-safety requirements, cleaning access, and the product’s relevant documentation. | Confirm compliance requirements with the building manager or relevant authority before installation. |
Measurement note: Panel dimensions, coverage, weight, fire performance, UV resistance, and fixing requirements vary by product. Verify the current product specifications and installation instructions before ordering or mounting.
In 2026, choose an artificial green wall by checking its fire documentation before judging how realistic it looks. Ask for test reports covering the exact foliage, backing, and installation method—not just a sample leaf. A fire rating for one component may not apply to the finished wall. Confirm that the documentation suits your building and intended location, and check relevant local requirements. Near heat sources or exit routes, get qualified advice. Labels can be confusing.
Durability depends on where the wall will live. For a sunny room or covered exterior, ask how the foliage handles UV exposure, temperature changes, and moisture. Check that leaves resist fading and that panels stay securely attached. Look closely at seams and corners; these often reveal weak construction sooner than the center does. I would not rely on appearance alone. A lush sample can hide a fragile backing.
Maintenance should fit your real routine. Dust may collect between dense leaves, so make sure you can reach the surface with a soft brush or vacuum attachment. Ask which cleaning methods are safe, and avoid assuming that ordinary household products will not damage the finish. Request written care instructions and a realistic replacement policy. It is easy to underestimate upkeep; even a low-maintenance wall still needs occasional inspection.
When choosing artificial green walls in 2026, compare suppliers on documented performance, not showroom impact. Ask for UV-resistance test results, fire-performance documentation, cleaning instructions, and samples exposed to similar light. A sunlit lobby can fade foliage that looks convincing under warm display lighting. Check whether panels can be replaced individually, and confirm replacement parts will remain available.
Read warranty terms line by line. Look for coverage periods, exclusions for sunlight or moisture, and who pays labor and shipping. A long warranty may sound reassuring, but it means little if normal indoor conditions void it. Request written answers and a dated product specification. That helps when staff or suppliers change.
The Global Wellness Institute’s 2024 Global Wellness Economy Monitor valued wellness real estate at $438.2 billion in 2023, with a projected $887.5 billion by 2028. This reflects broader design interest, not proof that artificial foliage improves health. Compare total installed cost, expected cleaning, repair access, and replacement needs over several years. A cheaper panel may cost more if its color cannot be matched later. Honestly, these estimates are imperfect; maintenance depends heavily on dust, airflow, and placement. Ask suppliers for references from projects with similar exposure, and inspect older installations when possible.
Compare supplier quotes, warranty coverage, and estimated long-term value—not just the upfront price.
The chart compares example 10-year costs per square foot, calculated as initial price plus 10 years of estimated annual upkeep. Warranty terms are shown for context and are not assigned a monetary value. Figures are illustrative scenario inputs, not market averages; use written supplier quotes and confirm what each warranty covers before deciding.